
Guys if you are a blogger then this article is for you. Guys, in this article today we are going to talk about "How will you remove the credit of free template of blogger?" and "How to put your credit?" You will be able to remove Footer Credit from Blogger template very easily and it is very easy to do that too from your mobile.
 |
| How to remove footer credit blogger theme with mobile, remove footer credit from blogger, how to remove footer credit from blogger template, sunny ki tech, sunny sharma, sunny sharma blogger |
How to remove footer credit blogger theme with mobile?
Whenever we use free blogger template, we get copyright area or credit in the footer of the blogger template. This credit or area is something like this - Craft with by template yard | distributed by blogger template. So we have to remove it. If you remove Footer Credit from Blogger template, then your blog looks like a professional blog, which helps to rank your blog in google, so you have to remove Footer Credit from blogger template.
To remove the Footer Credit from Blogger template, first copy the html code from the below copy code box, then follow the steps given below to avoid any problems.
To remove the Footer Credit from Blogger template, first copy the html code from the below copy code box, then follow the steps given below to avoid any problems.
How to remove footer credit from theme mobile?
Step-1. First of all, you have to go to the dashboard of the blogger.
Step-2. Then you have to go to the theme and click on three dots.

Step-3. After that you have to click on edit html.

Step-4. Now you have to find copyright area.
Step-5. To find your copyright area, you have to first come to the home page of your blog and go to Footer and copy the first word of the credit.
Step-6. "Craft By Website Designer | Distributed By MyBloggerThemes" is written in my template like this, then I will copy Created By. Now after this you have to come back to Edit HTML again and press Control + F.
Step-7. A Search Box will open in front of you on what you have just copied - Craft By or Designed by Paste it on this box and press Enter. You will get Copyright Area.
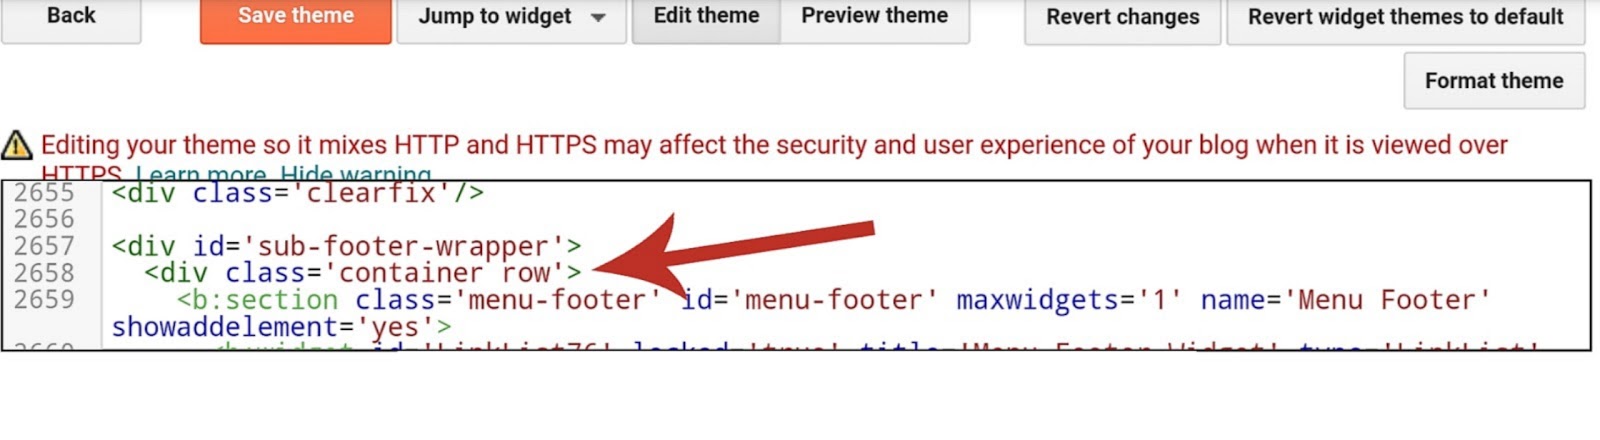
Step-8. Now a little above this copyright area you will see this code- <div class = "container row" which is shown in the screenshot below.

Step-9. Now you have to click in front of <div class = "container row" and press Enter which will bring down the space and then you have to paste the code under <div class = "container row". That you have copied.

Step-10. Now you have to come down a bit and enter this code.

You see on the image below, you will see some such code, you have to write this code under them. If your </div> becomes red, then understand that you have not written </div> in the correct place, then you can try writing it up or down. When this code becomes green, then your work became successful.
Step-11. Now you will get the icon of the gallery, click on it and save the theme.

Guys, if you liked this post then don't forget to share, comment, thanks.


1 Comments
Nice
ReplyDeletePlease do not enter spam link in comment.